|
Workstation Operating Systems |
|
When you are planning to use a computer as a workstation
is a network, you should make sure that computer meets the necessary
requirements. In some cases, it may only meet the hardware requirements
without any software. In some cases, something could be missing. In
previous lessons, we cover the issues related to making sure that the
computer was ready. In some other cases, you may plan to purchase brand
new computers that you would use to build your network.
|
Acquiring Brand New
Computers |
|
If you decide to purchase or are in the position of
purchasing brand new computers, as a reminder of what we reviewed in
Lesson 2, here are the hardware requirements the computer must meet:
- A processor with 300 megahertz or higher processor clock speed
recommended; 233 MHz minimum required (single or dual processor
system);* Intel Pentium/Celeron family, or AMD K6/Athlon/Duron
family, or compatible processor recommended
- 128 megabytes (MB) of RAM or higher recommended (64 MB minimum
supported; may limit performance and some features)
- 1.5 gigabytes (GB) of available hard disk space
- Super VGA (800 x 600) or higher-resolution video adapter and
monitor
- CD-ROM or DVD drive
- Keyboard
- Microsoft Mouse or compatible pointing device
|
One way you can shop for computers is to visit the web
site of one of the big companies on the Internet. The companies and their
web sites where you can do your shopping include, but are not limited to:
If you are shopping on a web site, select a computer
with Microsoft Windows XP Professional. The computer will certainly not
sell a computer that doesn't meet the hardware requirements. The web site
may also propose some upgrade or extra parts. If you can afford them, then
add them. The items that can be useful and helpful are a CD writer or a
DVD writer (or both) and a backup system.
Instead of the Internet stores, you can also go to a
computer store to buy the computers.
|
A Manufacturer's Installation |
|
If you bought a computer in a computer store or from a
web site and had Microsoft Windows XP Professional installed, either it
was already installed or you requested that it be installed, there is
nothing more to do at this time.
A new installation is suitable if:
- You have a new computer with no operating system at all
- You have a computer with an operating system but you want to
overwrite, that is, you want to install a new operating system on top of
the old one and you don't mind loosing (since you will loose, with a new
installation) whatever files already exist in the computer
- You have a computer with an operating system but Microsoft Windows
XP Professional doesn't support an upgrade from that existing operating
system
|
 Practical Learning: Performing a New
Installation of WinXP Practical Learning: Performing a New
Installation of WinXP
|
|
To perform a new installation:
- Turn the computer on.
*If you receive a message stating,
"Diskette drive 0 seek failure", open the computer and make sure the
power cable that connects the floppy drive is connected
*If you are
using a computer without an operating system, if you receive a message
stating "Missing Operating System", or "Strike F1 to retry boot, F2 for
setup utility", don't worry about it at this time
- Put the Microsoft Windows XP Professional CD in the CD drive and
restart the computer (you can press Ctrl + Alt + Delete to restart)
- After a while, as soon as the computer starts, a message will notify
you that the computer will boot from the CD and install the operating
system (the message may display "Press any key to boot from CD").
*If
a message of installing the operating system doesn't come up, you should
restart the computer. Then, as soon as the black screen of the computer
restarting appears, press a key such as F2 or F8 (but this may depend on
your computer or the manufacturer) to access the BIOS. Access the Boot
Sequence and check the list. If the CD (or DVD) drive is not on top and
if the instructions allow it, move the CD (or DVD) drive to the top of
the sequence. If you cannot move the CD (or DVD) drive to the top, then
disable the drives, such as floppy or hard drive, that come above it. In
some cases, you can select the drive and press the Space bar to remove
the check mark from the selected item. In this case, make sure that only
the CD (or DVD) drive has a check mark next to it. After making changes
in the BIOS to make the computer boot from the CD drive, save and exit
the BIOS. Then restart the computer and follow the instructions on the
screen to install the operating system.
*If a message of installation
still doesn't come up, make sure the CD drive is installed
appropriately. You could try to find out from somebody to get the
Microsoft Windows 98 boot disk (it is a floppy disk that would first
install the (driver for the) CD drive). (If you have access to the
Internet, you can also check the following site: http://www.bootdisk.com/
for a boot disk). Put that disk in the floppy drive and restart the
computer. After a while, a list of options will come up and ask you
whether you want to start the computer with or without the CD drive.
Select the option that states "without" the CD. After the CD drive has
been installed, make sure you remember the drive letter assigned to it.
Switch to that drive by typing it followed by : and press Enter. Then,
at the prompt, type setup.exe and press Enter. For example, if
the CD drive is D, after typing D: and pressing Enter, type
D:\setup.exe and press Enter
*If the computer still doesn't
boot from the CD and if you have access to the Internet, check the
following article from Microsoft: http://support.microsoft.com/?kbid=310994
As
stated above, when the installation starts, you may see a "Boot From CD"
message. In this case, press Enter.
After a while, you should see a
blue screen titled Windows XP Professional Setup and Welcome to Setup,
To Set Up Windows XP Now, Press Enter. To continue, press Enter
- The next screen will present to you the License Agreement. Read it.
If you don't agree with it, press Esc and stop the installation.
If
you agree with the license agreement, press F8 (or the appropriate key)
- The next screen asks you to select the partition you want to use to
install the operating system:
- If you have only one partition and it looks small, such as
less than 5 GB, simply select it
- If you have only one partition and that, regardless of its
size, you want to use it wholly to install the OS, select it
- If you have only one partition but it is large and you want
to create various partitions, first make sure it is selected.
Then, press C to partition it. The next screen would ask how
much space you want to use for the new partition. By default, it
will propose the total space for it. To reduce it, first press
Backspace a few times to delete the numbers, then type the
desired number of megabytes, and press Enter. Press the down
arrow key to select the Unpartitioned Space option and
press C. Continue the same way until you have created the
desired partitions.
A small partition of 8MB will be created
by Windows. Don't touch and don't delete it
- If you have many partitions already, to specify which one
will be used to hold the operating system, use the up and down
arrow keys to select it
|
- After selecting the partition you will use, press Enter to install
the OS in it
- The next screen will ask you to format the selected partition and
specify the type of file system you want to use. Select the Format
The Partition Using The NTFS File System option and press Enter
- In the next screen, the installation will start formatting the
partition. This may take a few minutes.
Once the formatting is over,
the installation will starting loading files. This may take a few
minutes
A wizard, titled Windows XP Professional Setup, will come up.
Its first page presents you with two options.
The first choice
consists of changing the Regional and Language Options. If you click
Customize, the Regional and Language Setup Options dialog box will come
up:
 |
The default options will be selected depending on your version of the
CD. For example, if you bought the OS intended for a US use, the US
English would be selected. If you want to change the language, click the
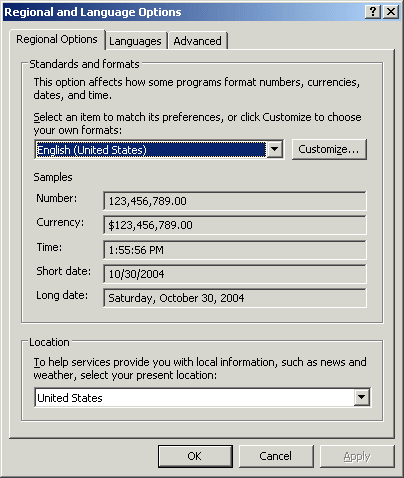
Customize button. Another dialog box, titled Regional and Language
Options, would come up with English (United States) selected. You can
then click the arrow of its combo box to change the language. After
making your selection, you can click OK. If you don't intend to change
anything, you can click Cancel.
The bottom option consists of making
changes to the way the keyboard will interpret text. Once again, if you
are installing the OS intended for a US audience, the US English is
selected by default. If you want to change it, click Details. This would
open the Text Services and Input Languages dialog box. You can change
the language by clicking the arrow of the combo box. After making the
change, you can click OK. To ignore any change, you can click Cancel or
press Esc.
After dealing with the Windows Setup dialog box, click
Next
- The next screen request that you enter your name or the name of the
primary person who will be using the computer. You must type a name
other than Administrator or Guest
- The other text box, Organization, expects the name of the company.
Make sure that you provide this information
- After entering the name and the organization, click Next or press
Enter
- The next page of the wizard requests the Product Key, which you must
enter
- After typing the product key, click Next
- The next page of the wizard, expects you to type the computer name.
It also suggests a default based on the organization you entered. You
can accept the suggested name, which you can still change later on, or
you can type a new name
- The dialog box also requests a password for the administrator. This
password will be stored locally, on the computer. Type a semi-difficult
password in the Administrator Password text box, such as
P@s$w0rd8
- Type the exact same password in the Confirm Password text box
- Press Enter
- The next page of the wizard allows you accept or change the current
time, the date, and the time zone of the computer. After making your
selection, click Next
- The installation will start/continue copying files.
After a
while, a dialog box titled Windows XP Professional Setup will prompt you
for Network Settings. Accept Typical Settings and click Next
- The next page of the wizard will prompt you to specify the name of
the network or to join a domain. Accept the default of WORKGROUP and
press Enter.
The installation will continue copying the files
- When the installation finishes copying the files, the computer will
reboot. When it comes up a Welcome to Microsoft Windows message will
display. Click Next
- In the next screen, accept the "Yes, this computer will connect
through a local area network or home network" radio button and click
Next
- In the next screen, click the "No, not at this time" radio button
- Click Next
- The next screen prompts you to enter at least one name. Enter a name
that is neither Administrator, nor Guest, nor the name of the computer
- Click Next
- The next screen displays Thank You and Congratulations...
Click
Finish
The computer will display Welcome for a few seconds and change
to the desktop
If your computer already has an operating system
installed, instead of performing a new installation, you can upgrade the
existing one. This would preserve the existing files and other items, such
as the computer name, the password, the name of the network, etc, and
would only install the new features and other improvements.
To perform an upgrade:
- Start the computer as you usually do
- Open the CD drive. Put the CD (or DVD) that contains Microsoft
Windows XP Professional in the drive and close its door. A window will display and present you some options.
- Click Install Windows XP.
Another window will come up with a
dialog box on top of it. The dialog box will present you the option of
performing a new installation or upgrading. To choose, click the arrow of the Installation Type combo
box and select your desired option.
Keep in mind that if you
perform a new installation, all existing files will be lost. When in
doubt, accept to upgrade
- After making your selection in the dialog box, click Next
- You will be presented with the License Agreement. Read it. If you
agree with it, click the I Accept This Agreement radio button and click Next. If
you don't agree with it, click the second radio button and and click
Next to stop the installation
- If you agreed with the License Agreement and clicked the first radio
button, click Next
- The next screen will request the Product Key. Enter it
- Click Next
- In the next screen, if you (already) have an Internet connection, accept the first radio button so the installation would
check updates on the Microsoft web site. If you don't have an Internet
connection or you don't want to check the updates (since you can do this
later on anyway), click the second radio button
- Click Next
- Continue the installation. At one time, the computer will reboot
(itself). Some time to time, the computer will go blank for one second
or half a second. Don't worry about that. It will only be a good sign.
Let it flow until it prompts you for something. Don't expect this quiet
(and perhaps boring) installation to take less than 30 minutes (in fact
more than that). Meanwhile, if you have nothing else to do, the
installation will present (somewhat advertising) messages that you can
read or admire to keep yourself busy
- When the installation is over and the computer has rebooted, a
Welcome to Microsoft Windows will display with Thank You For
Purchasing Microsoft Windows XP. Let's Spend A Few Minutes Setting Up
Your Computer.
Click Next
- The next screen will ask you whether you want to register online.
Click the No, Not At This Time radio button (unless you want to
register at this time, in which case you would click the first radio
button)
- Click Next
- The next window, titled Let's get On The Internet, would prompt you
to setup the Internet at this time.
Click the Do Not Set Up An
Internet Connection At This Time radio button
- Click Next
- A Thank You message will show Congratulations, You're Ready To
Go!
Click Finish
You may be presented with
a (blank) window with only one or two icons including Recycle Bin.
This would simply indicate that the installation was fine.
Congratulations
After performing an installation of the operating
system, you can perform some routine operations to check or change things.
To check the name of a computer, open Control Panel and
double-click System. Alternatively, you can right-click My Computer and
click Properties. In the System Properties dialog box, click the Computer
Name tab. |
|
